
Facebook Integration Module
Facebook now imposes strict limitations (see Instructions section) and requires “page_messaging” permission for the app to be received (which is not so easy). If you will manage to receive “page_messaging” permission for you Facebook app (actually many people managed to do it and are using this module) – feel free to acquire and use this module, but please don’t expect any help or support from FreeScout Team.
This module converts private messages sent to your Facebook Page into FreeScout conversations and allows support agents to reply from FreeScout.
In order to use the module you will need to create a Facebook app and perform Facebook Business Verification by uploading an official document showing your business or organization’s name and physical address.
Each mailbox can be connected to it’s Facebook Page.
Facebook conversations are marked with the corresponding badge.

By default all messages received from some customer via Facebook always go to the same conversation in FreeScout. If you want a new conversation to be started after existing conversation is Closed or Deleted, use corresponding option in each mailbox’s settings under “Edit Mailbox”.
Before Purchasing
Before purchasing the module it is highly recommended to create Facebook Business Manager Account and verify your business on Facebook (to be sure that you have Verified Facebook Business Account before purchasing the module):
1) Create Facebook Business Manager Account at https://business.facebook.com/overview
2) Perform Facebook Business Verification (verification process may take several days): https://www.facebook.com/business/help/1710077379203657?id=180505742745347
3) Purchase this module and follow instructions below.
Requirements
- PHP >=7.1
- FreeScout should use HTTPS protocol
- FreeScout should NOT be protected with Basic HTTP Authentication.
Debugging
Facebook integration errors are logged in:
- “Manage » Logs » Facebook Errors” in FreeScout
- “Manage » Logs » Apps Logs” in FreeScout
- Webhook’s “Show Recent Errors” on Facebook
Instructions
In order to integrate your FreeScout with Facebook page you will need to create a Facebook app at https://developers.facebook.com
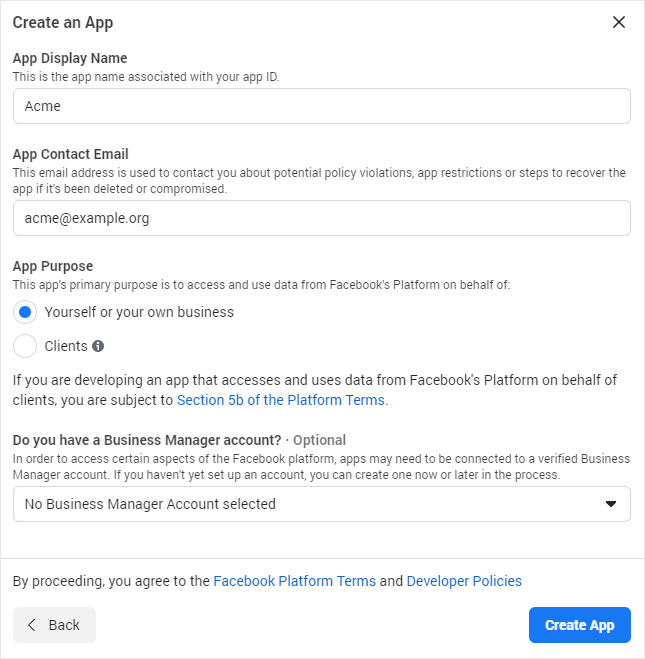
1) Follow Requirements section of the “Setting Up Your Facebook App” (skip the last “Webhook URL” step). When creating the app, choose “Manage Business Integration” as the type.
2) On the app’s Dashboard page scroll down to “Add Products to Your App” click “Set Up” under Messenger.
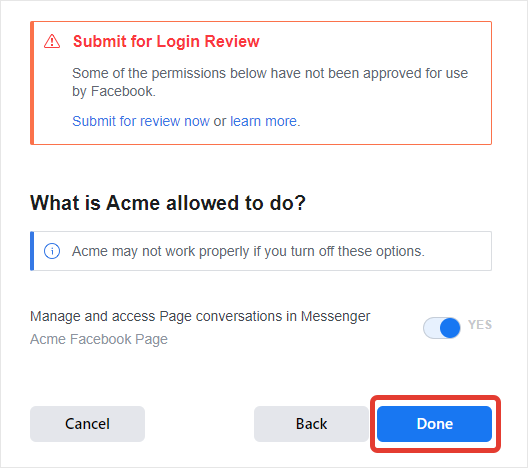
3) Go to the app Settings and click “Add or Remove Pages” and select the pages you want to subscribe your app to. When you see the following dialog, just click “Done”.
4) In the “Access Tokens” section click “Generate Token” and copy generated Page Access Token.
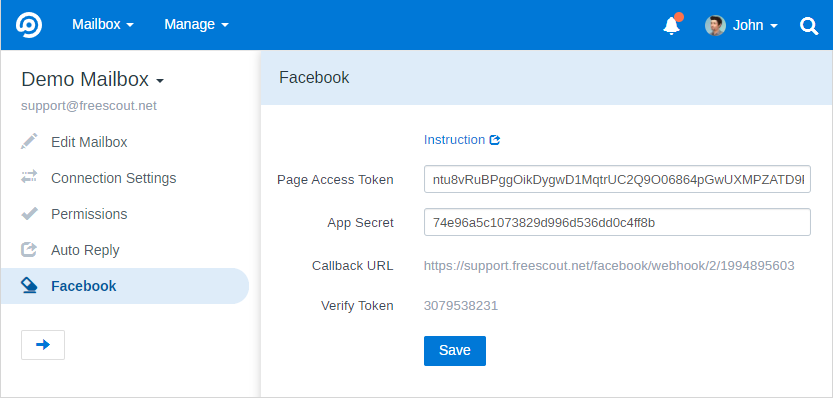
5) Go to FreeScout and enter received Page Access Token and App Secret (from Facebook app’s Basic Settings page).
6) On Facebook in the “Webhooks” section click “Add Callback URL” and enter Callback URL and Verify Token (you can find them in the FreeScout).
7) In the “Webhooks” section click “Add Subscriptions” and select “messages”.
8) To test that your app set up was successful, go to Facebook Messenger and send a message to your Page – you should receive a new message in the FreeScout. If not – check “Manage » Logs » Facebook Errors” or “Manage » Logs » Apps Logs” in FreeScout or webhook’s “Show Recent Errors” on Facebook.
9) Complete app info in “Settings » Basic”.
10) In your app on Facebook go to “App Review » Permissions and Features” enable “Advanced Access” for “public_profile” and “page_messaging”. To receive “page_messaging” permission is not easy as you have to provide Facebook testers the way to check how your app is using the permission. Until this permission is granted this module will not work. When asked “Please provide a detailed description of how your app uses the permission” enter the following: “page_messaging permission is needed to communicate with Facebook users via FreeScout helpdesk.”
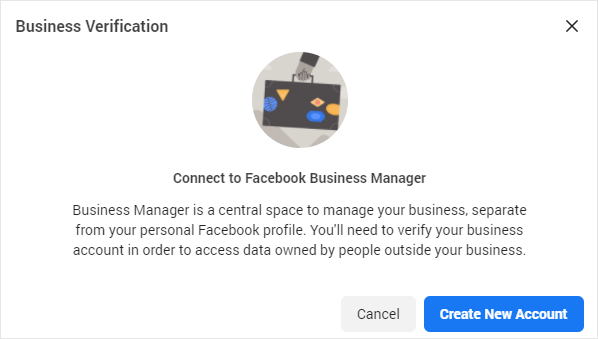
11) In order your Facebook app to go LIVE, you need to verify your business and submit the app for approval. Until your Facebook app is not LIVE, only app administrator’s messages can reach your FreeScout. In Settings > Basic in Verification section click “Start Verification”. Individual Verification is not available on Facebook at the moment, you will need to perform Business verification by uploading an official document showing your business or organization’s name and physical address. Facebook will ask you to connect your app to Facebook Business Manager.
12) Click Submit for Review and agree to our Platform Onboarding Terms in the window that appears.
Auto Replies
If you want to send auto replies to customers messaging you via the Facebook you can use Workflows Module (“Communication Channel” condition allows you to distinguish messages sent via the Facebook).
Limitations
If your business is located in Europe (or Japan) or page admin is from Europe (or Japan) or Facebook user from Europe (or Japan) is messaging you, due to data protection regulations EU and Japan the name of the Facebook user in the FreeScout will be seen as “Facebook” instead of real Facebook user name. Also attachments except for images (audio, video, files, etc.) on incoming and outgoing tickets will not be sent.
Troubleshooting
If integration works only for Facebook app admin, it means your app is not live (see Step 10 above).