SAML SSO Module
This module enables SAML 2.0 single sign-on authentication in FreeScout for users (admins and support agents). FreeScout works as a Service Provider (SP) and allows users from another system called Identity Provider (IdP) authenticate in FreeScout. This module can be used with any SAML 2.0 Identity Provider.
Notice: If you have any other non-official SAML module installed – remove it before installing the official one.
Requirements
IdP should be configured to return email address in NameID property. If IdP returns something else in NameID property the module will trying to find user email address in the following user attributes which may be sent by IdP: email, emailaddress, emailAddress, email_address or mail.
Signature Algorithm is RSA-SHA256.
Settings
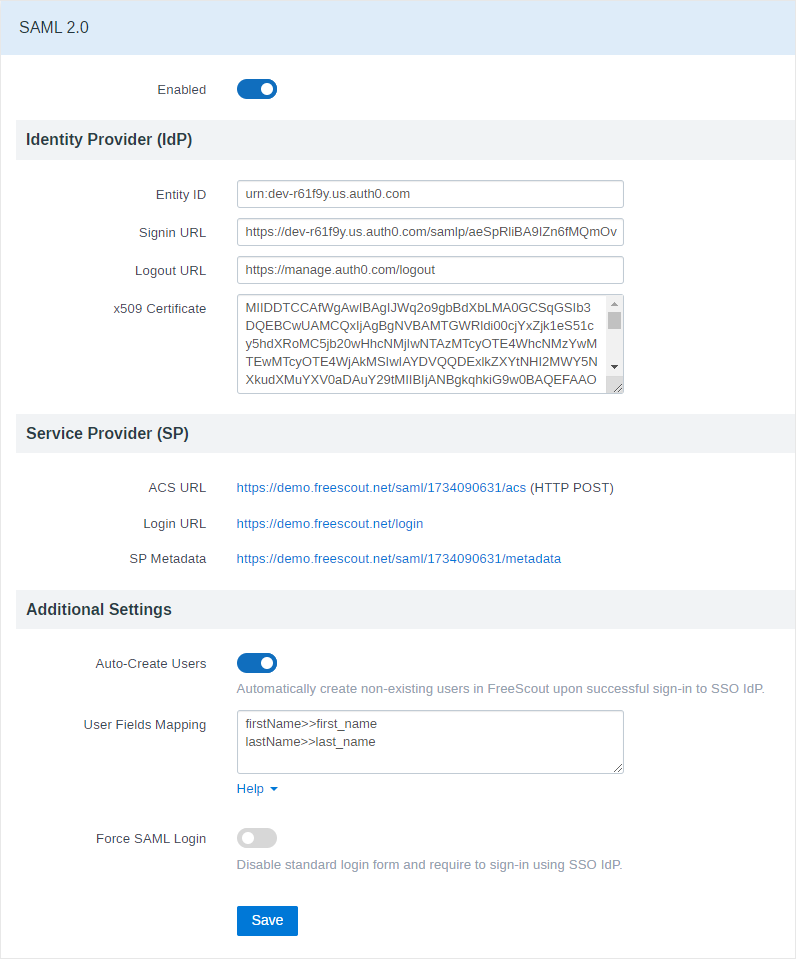
The module allows to connect to one IdP only. There is no way to connect to multiple IdPs.
Entity ID in some IdPs can be called “Issuer”.
IdP x509 Certificate field should not contain “—–BEGIN CERTIFICATE—–” or “—–END CERTIFICATE—–“, only what’s in between them.
IdP may require you to enter in it’s settings Service Provider’s ACS URL. Make sure that IdP accesses it via “HTTP POST” method (“HTTP Request” method is not supported).
Also IdP may require you to upload Service Provider’s Metadata. You can get your metadata via “SP Metadata” link. From there is can be copied and manually saved into “.xml” file for example.
When you enable Users Auto-Creation the following user fields can be mapped: first_name, last_name, job_title, phone.
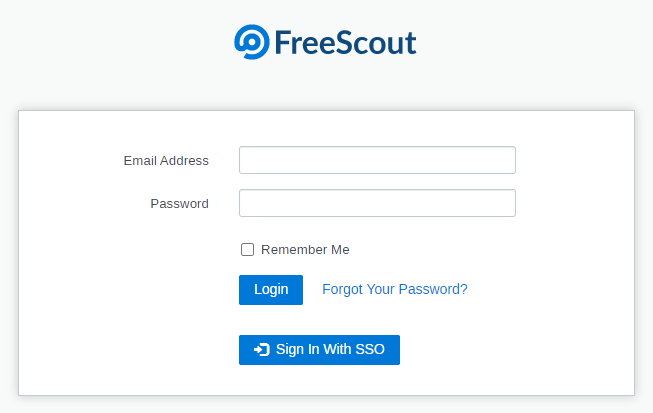
If you’ve enabled “Force SAML Login” and want to show an ordinary login form, just add “saml=0” to the login page URL: /login?saml=0. If “Force SAML Login” option is disabled and you want to redirect users to SAML login, just add “saml=1” to the login page URL: /login?saml=1
Troubleshooting
If SAML integration does not work for you – try to disable “Strict Mode” option (like in this case). Please note that this reduces security, so proceed at your own risk.
Limitations
The module does not allow to maps users to mailboxes or Teams.
If you have 2-Factor Authentication enabled and “Required For All Users” your users will have to pass 2FA after logging in via SAML.
Identity Providers (IdP) Configuration Examples
Auth0
Follow this instruction to enable SAML SSO in Auth0.
x509 certificate can be obtained in “Addon: SAML2 Web App » Application Callback URL” enter “ACS URL” from “Service Provider (SP)” section. Do not change anything in “Addon: SAML2 Web App » Settings”
If you want you can specify the following IdP Logout URL in the module’s settings: https://manage.auth0.com/logout
JumpCloud
SAMLSubject NameID: email
SAMLSubject NameID Format: urn:oasis:names:tc:SAML:1.1:nameid-format:emailAddress
Signature Algorithm: RSA-SHA256
Attributes Mapping:
firstname>>first_name
lastname>>last_name
jobTitle>>job_title
If you want you can specify the following IdP Logout URL in the module’s settings: https://console.jumpcloud.com/userconsole/logout
Microsoft Azure
Make sure to enter the following “Authentication context” in SAML settings in the FreeScout: urn:oasis:names:tc:SAML:2.0:ac:classes:X509
Instruction on how to configure SAML SSO with Azure: #3087
See also these threads related to Azure on GitHub: #2088, #1985, #2097
If you see “Authentication method ‘Password, Multifactor’ by which the user authenticated with the service doesn’t match requested authentication method ‘X509.'” error in your browser (see this), enter the following authentication in SAML Module configuration: contexturn:oasis:names:tc:SAML:2.0:ac:classes:unspecified
Google Worksuite
1) In Google Apps login to admin panel and navigate to “Apps » Web and mobile apps”.
2) Click “Add App » Add custom SAML app”.
3) Configure basic app information (this will be what is shown in available apps for your users).
4) Click Continue.
5) Copy the following information from the next page which shows the IDP for Google and enter in FreeScout:
- Use “SSO URL” for “Signin URL”
- Use “Entity ID” for “Entity ID”
- Use “Certificate” for “x509 Certificate”
6) In Google Click Continue.
7) Next you will be asked to enter details from FreeScout:
- Use “ACS URL” for “ACS URL”
- Use “SP Metadata” for “ENTITY ID”
8) Scroll down and select SIGNED RESPONSE.
9) Scroll down further and change Name ID format to EMAIL from the default UNSPECIFIED and then the next field change NAME ID to BASIC INFORMATION > PRIMARY EMAIL (This will use the domains email for your workspace account).
10) On the next screen after clicking “Continue” you can map user fields. Click “Continue” and select which groups in your organization you want to have access to the app, the app is off for everyone by default. Once selecting on for everyone or the group you want click test sign in on the sidebar under the app. Make sure you are signed out of FreeScout first, otherwise it will use the current sign in and trigger a false positive for sign in.